
Building your own Hey email Feed in Gmail
If there’s one epic idea Hey.com has, it’s the Newsletter Feed. Like a social feed, you can scroll through these newsletters, read what’s interesting, skip what’s not. It feels natural. It feels unlike regular email.
However, it gets annoying quickly. Some newsletters are very long, the UI is janky, some feed items are randomly skipped, and it’s a pain scrolling through the long emails I’ve lost interest in.
The second epic-in-principle idea is screening people in so random emails don’t reach me. Some companies are pesky and don’t respect unsubscribe buttons. This can get annoying quickly: I have to go the extra step of approving people who I know will email me, or for OTPs coming to my mail.
While I appreciate Hey’s way of thinking about email, their too constrained approach doesn’t suit me. So, I replicated their principles in Gmail, in a way that really works for me.
It took me less than 5 minutes to set up (and more than a few hours to figure out). But, I’ve been using this system for the past 6 months, and recently cancelled my Hey subscription: this approach works so much better for me, and builds into tools I already use.
This is the way: Multiple Inboxes in Gmail.
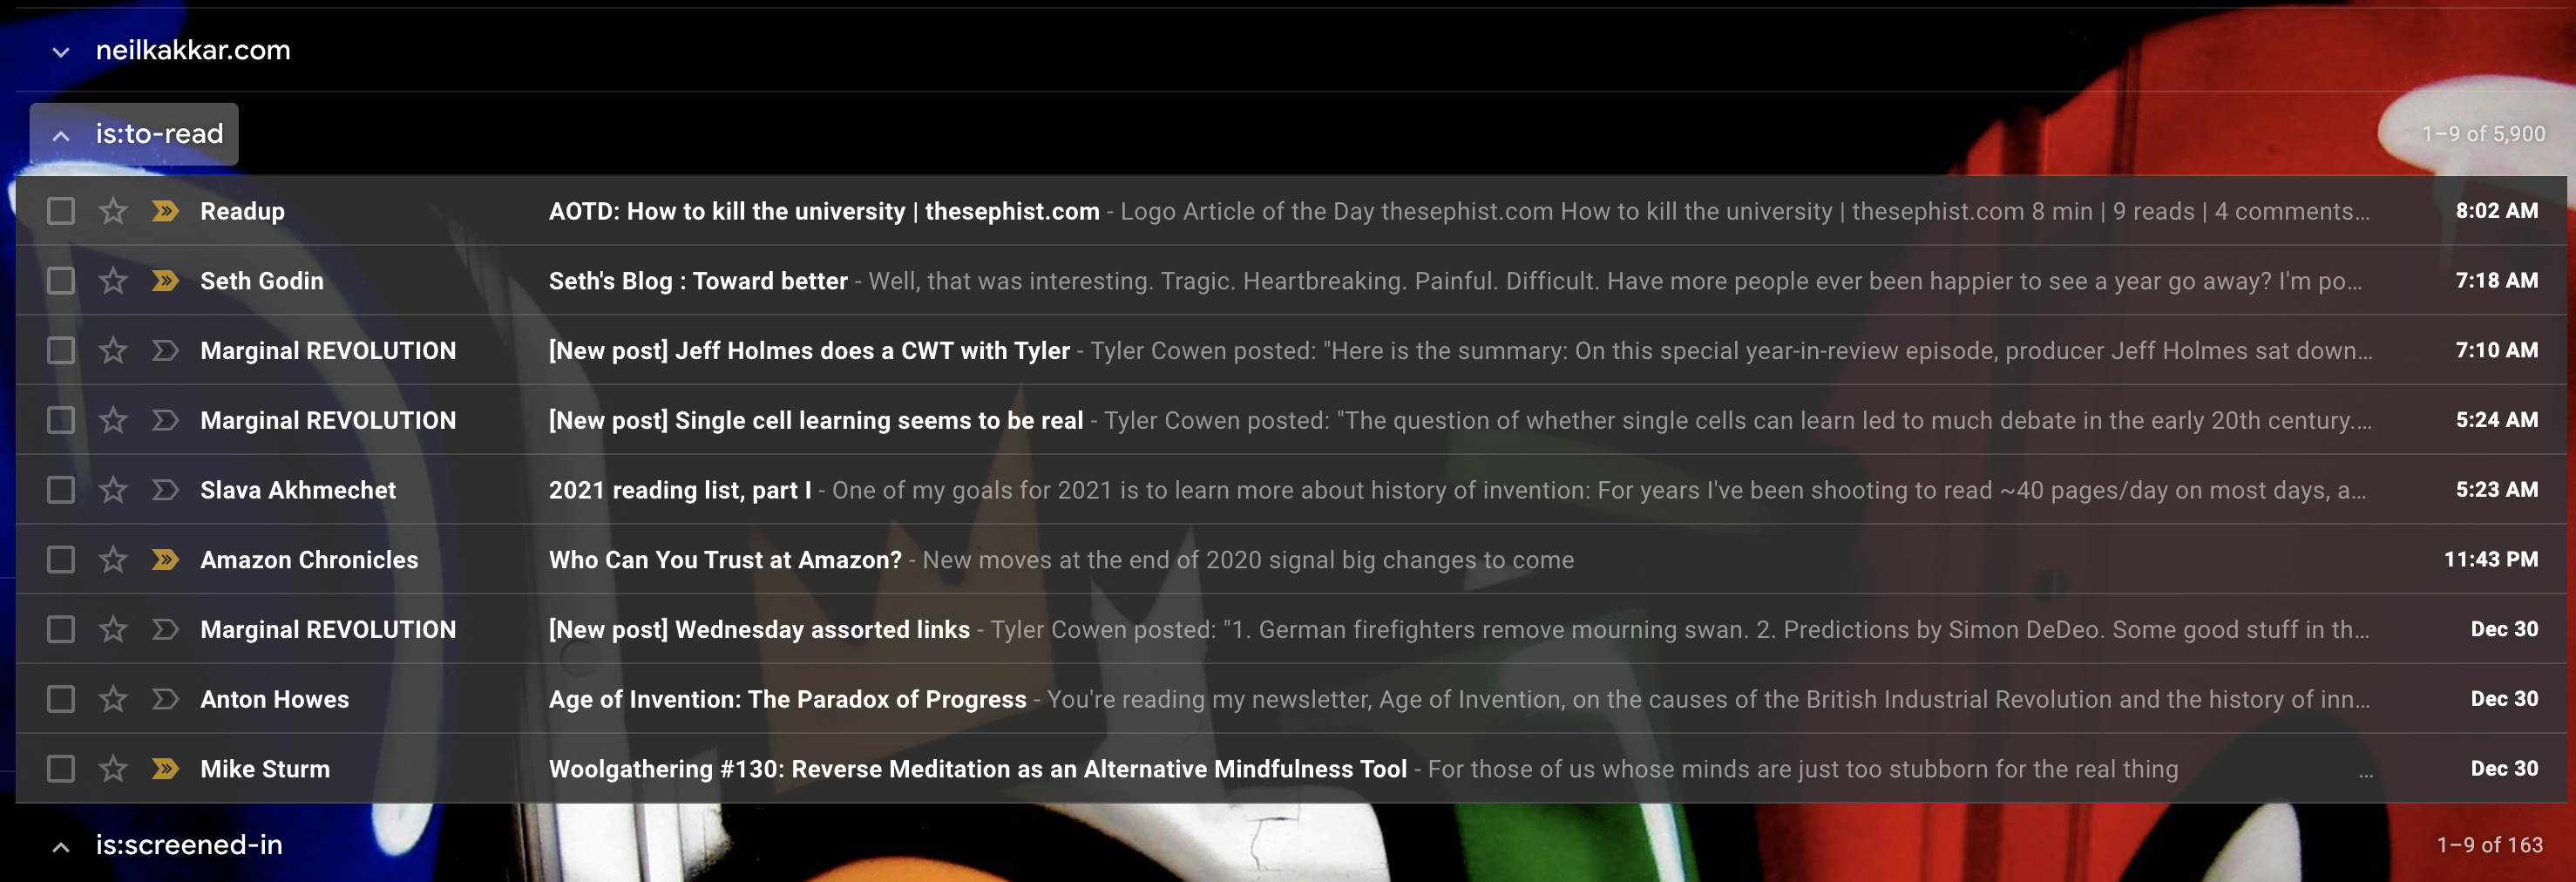
Here’s how it looks:
This setup works really well for work, too. I have an extra inbox for email from GitHub, which has almost all of my work related emails, neatly separated from the rest, and I can go through them just like this newsletter feed.
The sections below show you how to set it up from scratch.
How to create a Newsletter Feed in Gmail
We’ll work with labels, automatic filters and multiple inboxes. Together, these make Gmail very powerful.
Step 1 -> Enable Multiple Inboxes. Go to Settings -> See All Settings -> Inbox (3rd tab) -> Inbox Type: Multiple Inboxes.
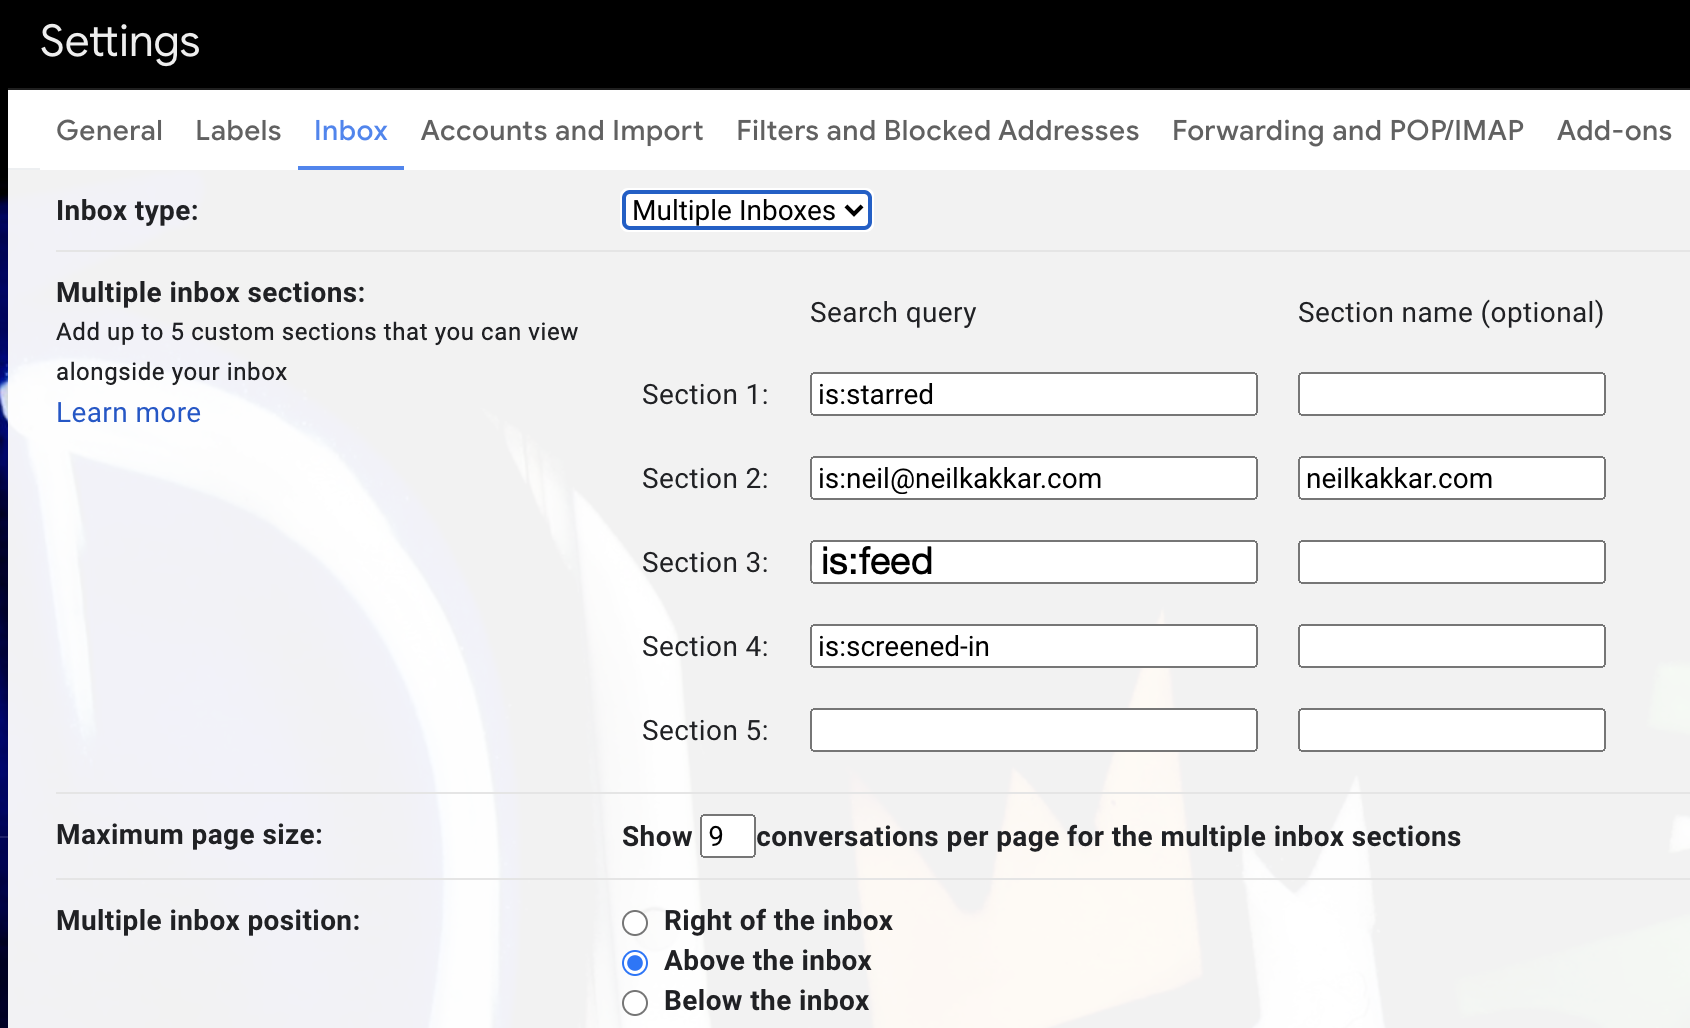
Fill in Section 3 with “is:feed” and then click Save Changes at the bottom.
Step 2 -> Set up automatic filtering for a new label called “feed”.
The video below shows how to do this in depth. You can alse see the official documentation.
Note that we’ll be choosing what to include in the feed, and also what not to. A good idea is to skip the Inbox as well, so these don’t show up as duplicates. If you want to see everything together in one inbox, you can go to “All Mail”.
Here’s how my filter looks:
{from:@substack.com from:@rootsofprogress.org} OR (from:notify@sethgodin.com) OR (“Farnam Street” OR “Idea Muse”)
{} is short form for multiple ORs. Anything without an OR is an AND. I like separating them out to distinguish domains, specific addresses and string searches.
The first part filters in all emails from these domains - {from:@substack.com from:@rootsofprogress.org}. The beauty of this is that all substack newsletters automatically go into the feedbox, instead of manually choosing them one by one.
The second part filters in emails by specific sender - (from:notify@sethgodin.com). I do this when I don’t want mails that aren’t about blog posts in the feed box. For example, notify@sethgodin.com sends blog posts, but seth@sethgodin.com sends other blog updates. I only want one in the feed.
The third part filters in emails by string matching - ("Farnam Street" OR "Idea Muse"). I use this when I’m being lazy, or the newsletter title is catchy, or if I want to see mails that reference these newsletters as well.
You could also filter via just the subject line, like so: OR subject:"Idea Muse". This will only look in the subject, instead of the full email.
Next, whenever you find something to add or remove from your feed, you can edit this filter, like so:
Note:
It’s important to re-edit using the “Advanced Search” button, and not the search bar. Otherwise, you lose the filter.
How to scroll through a newsletter feed in Gmail
I do like scrolling through mails together, but I’ve settled on a low-tech, future-proof compromise here.
I setup keyboard shortcuts so that I can quickly switch to the next mail, so if it’s too long I don’t have to scroll to the end.
I use my right hand to scroll through the email, and my left hand is on the 1 and 2 keys. Older mail is 1. Newer mail is 2.
Whenever I get bored, I press 1, to see the next feed email. This works surprisingly well.
In normal mode, I keep the feed box collapsed, so I don’t see those mails, and check the feed out in bulk on weekends.
On my real Gmail account, it looks like this:
How to set up screening in Gmail
This is an additional Inbox with a screened-in tag. In the end, the Inbox becomes the graveyard, or an opportunity to filter things in and out.
The filter is what looks different. Follow steps 1-2 above, and then modify the filter like in the video below.
We don’t want to include things that are labelled as feed already, so: “-label:feed” is the first part, and then, I like to add all gmail.com addresses to the filter - this isn’t usually companies, is majorly friends, which means I don’t face headaches having to screen them in all the time.
The full filter looks like this:
{from:@hackernewsletter.com from:@gmail.com from:@neilkakkar.com} -from:hestonb3@gmail.com -label:feed
I add my own email to the not list (hestonb3@gmail.com in this example), so that things I send don’t show up in screened-in.
You’ll note how a “spam” mail I sent from my hey address is still in the Inbox (end of video) - I can now decide whether I want to screen it in, or archive it, or let it be. Screened-in is the main inbox now.
In the end, things look something like:
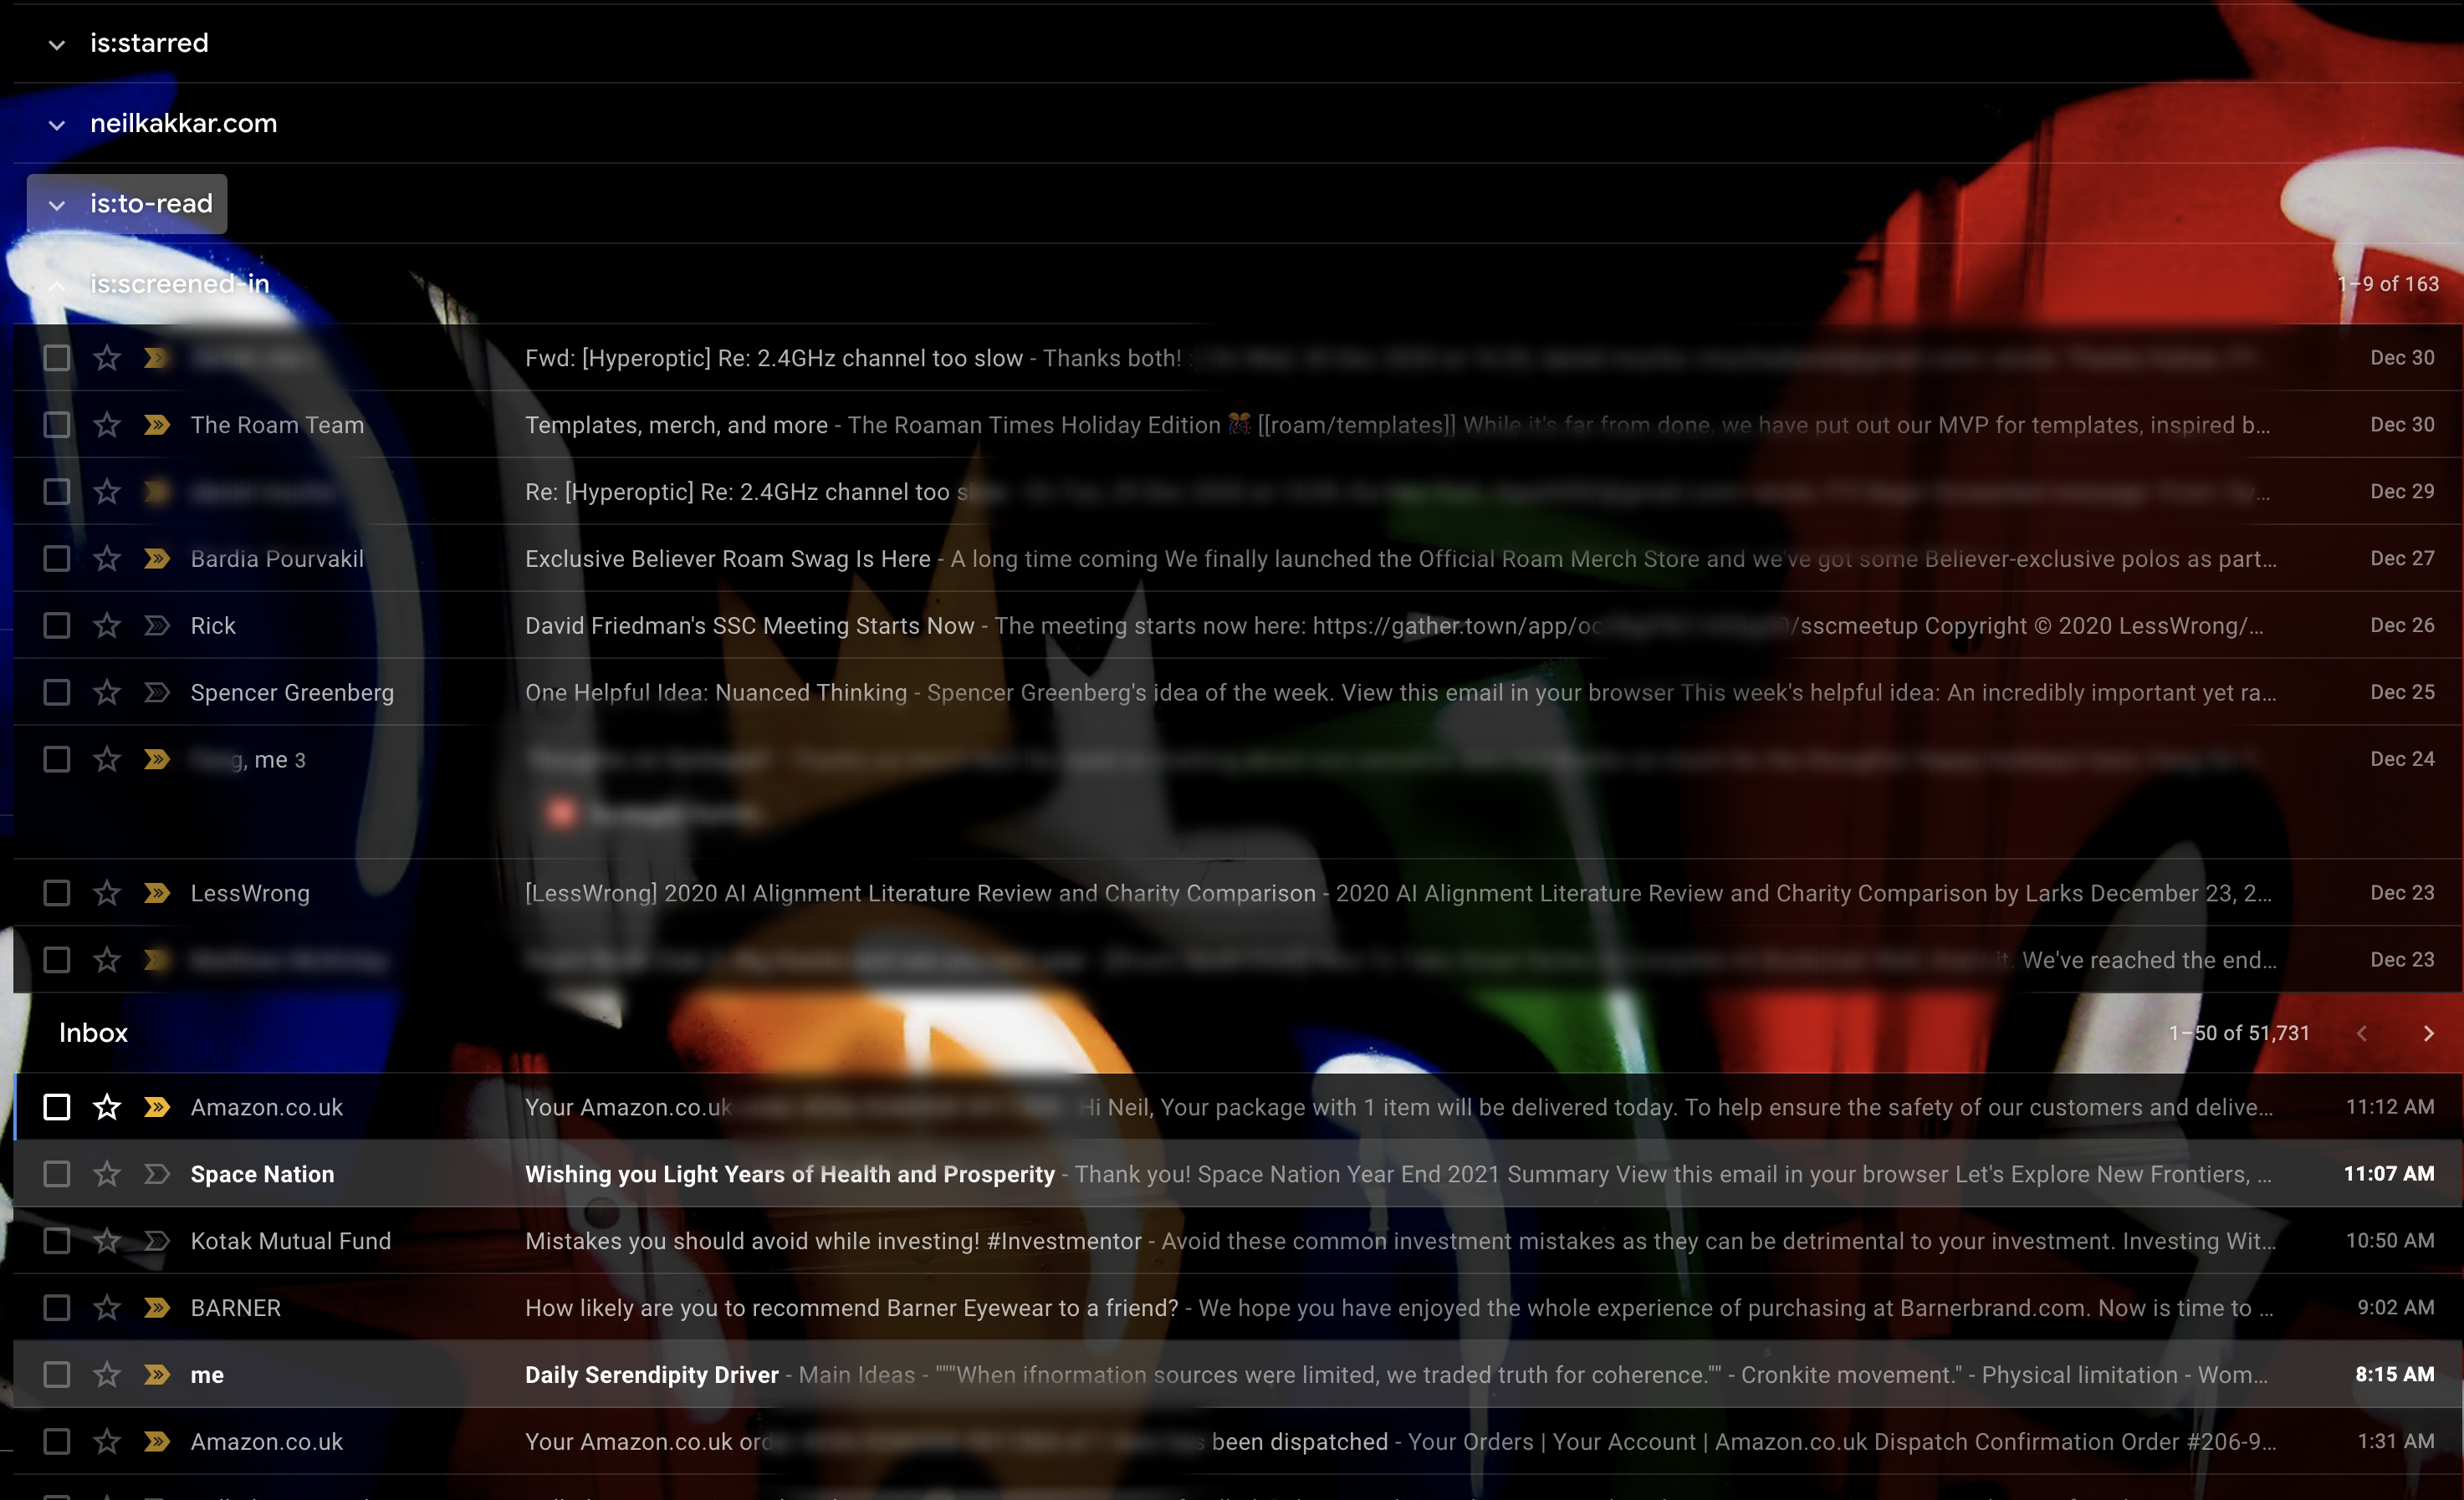
Notice the timestamps - Inbox fills up much quicker than screened-in, full of mostly crap you don’t want to waste time on.
So, whenever something new comes into the Inbox, and I notice I don’t want it there, I either add it to the screened-in filter or the feed filter.
I generally don’t look at the Inbox, as all important mails are in the screened-in box and the feed is in the feed box.
Note:
Filters are applied in the order they’re written in the Settings, so if your filter includes a label tag, make sure the filter for that label is above this filter!
Another important advantage here is that your Inbox still gets emails you otherwise have not labelled. So, there’s no risk of missing out on important emails from new people.
Oh, and the Hey paper trail is mostly not useful. Not worth setting it up.
I can set all this up once, and then mostly forget about it. It makes things powerful, better integrated, more customizable, and finally, £99 cheaper.
If you know of any other ways to do this that work better, let me know!
You can send yourself an email with this post.You might also like
- How to setup duration based profiling in Sentry
- How to simulate a broken database connection for testing in Django